How to Run a Farmers Market (Step-by-Step Guide)
Updated: January 2026
Running a farmers market sounds simple until your team is managing vendor intake, approvals, booth assignments, permits, weekly attendance, money review, and market-day changes at the same time.
That is why generic market management software and spreadsheets usually break down. The real work is not just collecting a form or tracking a payment. It is keeping the whole weekly workflow connected.
This guide explains how to run a farmers market using the kind of workflow The Market Manager is actually built for.
What is farmers market management software?
Farmers market management software is a system designed to manage vendor applications, approvals, payments, booth assignments, permit review, and market-day operations for recurring markets. Instead of relying on spreadsheets and email, it keeps the full workflow of running a farmers market in one connected place.
Quick summary
To run a farmers market successfully, you need to:
- Set up market structure, fees, and booth capacity
- Open application programs and collect applicants in one place
- Review applications and request follow-up through a real queue
- Hand approved applicants into live vendor records
- Build your booth map and assignments
- Run sessions, invites, and vendor submissions each market cycle
- Review fees, payments, reconciliation, and carry-forward balances
- Track permits and readiness before market day
Table of contents
- Set up your market structure
- Open application programs
- Review applications and request follow-up
- Hand approved applicants into live vendor records
- Build the booth map and assignments
- Run sessions and collect vendor submissions
- Review money, reconciliation, and closeout
- Keep permits and recurring readiness in shape
Step 1: Set up your market structure
Before vendors enter the workflow, define how the market itself will operate.
In practice, this usually means setting up:
- market schedule and recurring operating dates
- vendor types and category mix
- booth inventory and booth rules
- fee rules, surcharges, and exemptions
- permit requirements by vendor type or market scope
- the reporting inputs your team needs later
The clearer this structure is upfront, the easier it is to keep intake, sessions, and billing consistent later.
Step 2: Open application programs
In this product, application intake starts with a public application program.
That gives your team a place to:
- open or schedule intake
- connect the program to one or more markets
- define requirements and file uploads
- capture applicant details in a structured way
- give applicants a portal for later updates
This matters because the application program does more than collect form answers. It sets up the review workflow and the eventual handoff into live vendor records.
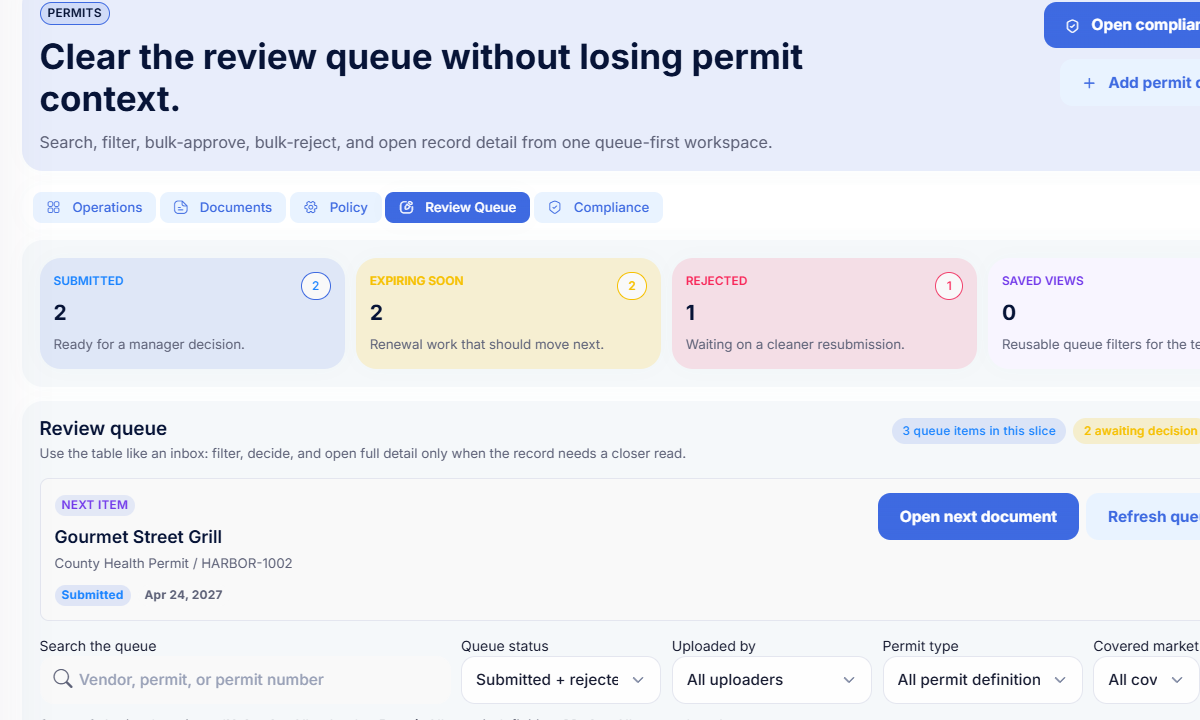
Step 3: Review applications and request follow-up
Once applications are submitted, the next step is not just reading them one by one. It is working them through a real review queue.
The actual review flow in this product uses statuses such as:
- submitted
- under review
- needs more info
- resubmitted
- approved
- denied
- archived
Managers can request more information, review files, and keep the full history of the decision instead of losing context in email threads.
Step 4: Hand approved applicants into live vendor records
Approval is not the end of the workflow.
In the real system, approved applications can be handed off into:
- a live vendor record
- a vendor type
- one or more market attachments
- ongoing notes and readiness tracking
That handoff is a major operational advantage because your team does not have to rebuild the same business and contact record in a second system after approval.
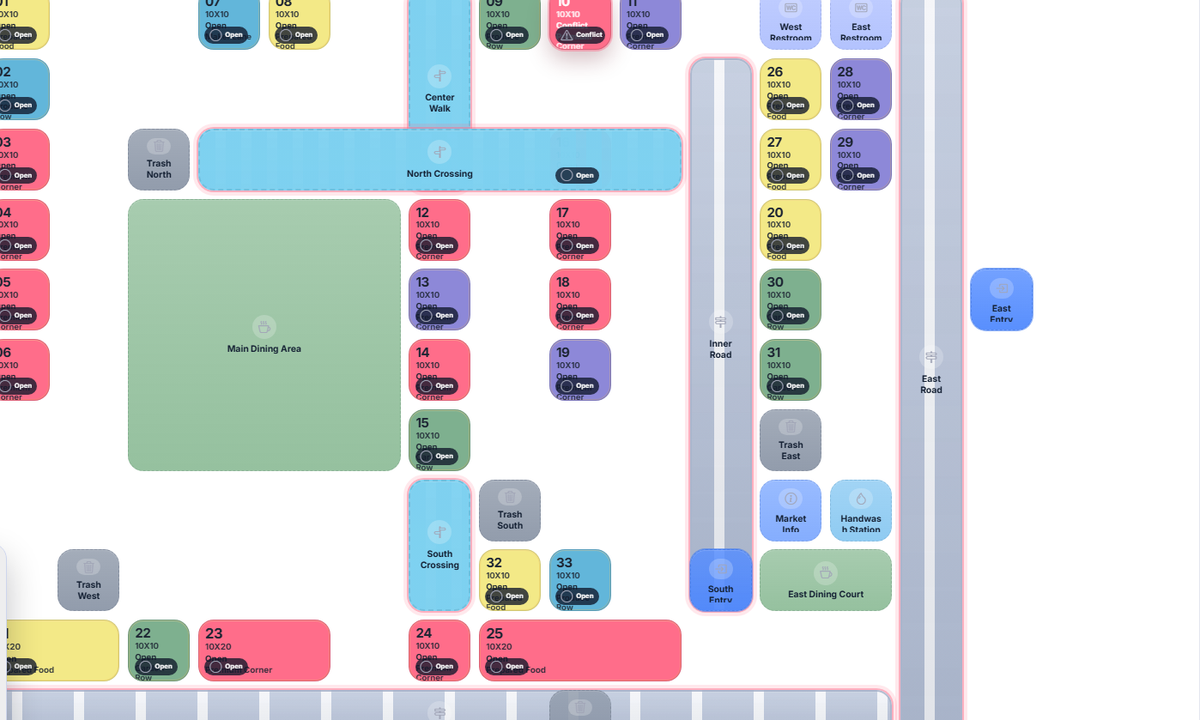
Step 5: Build the booth map and assignments
Once vendors are live in the market, they can move into booth planning.
The booth map workflow supports:
- booth zones
- numbered booths
- roads and foot-traffic paths
- entries, restrooms, handwash stations, dining areas, and other map elements
- vendor fit checks so assignments stay clean
- fast actions like clearing, opening, marking unavailable, or swapping booths
This is one of the clearest places where a connected farmers market management software built for recurring markets beats a static spreadsheet or PDF map.
Step 6: Run sessions and collect vendor submissions
Recurring markets need a weekly operating rhythm, not just a roster.
The Market Manager handles that with sessions and invites:
- sessions are created and synced from market schedules
- vendors receive magic-link invites
- vendors submit attendance and sales information
- managers can reopen submissions or correct them when needed
This turns market day from a one-off scramble into a repeatable operating cycle.
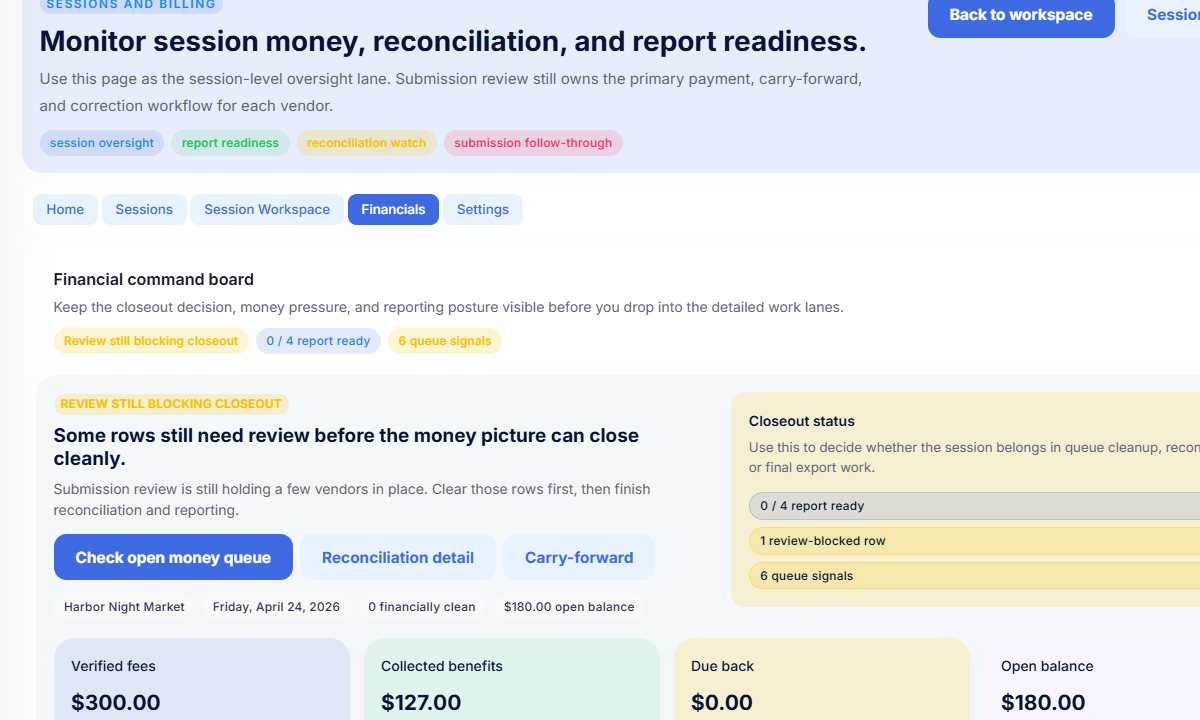
Step 7: Review money, reconciliation, and closeout
This is where the product is more specific than a generic billing tool.
The money workflow is tied to session activity, fee records, recorded payments, reconciliation, and carry-forward. That gives your team one place to review:
- pending or partial fees
- payment records
- review-blocked rows
- reconciliation issues
- balances that belong to a future session
- report readiness before closeout
That is much closer to how recurring markets actually operate than a basic invoice list.
Step 8: Keep permits and recurring readiness in shape
A farmers market is not really ready when applications are approved if permits are expired, missing, or still under review.
The permit workflow in this product keeps document review connected to the vendor record through:
- document statuses
- reminder events
- follow-up notes
- approval and rejection decisions
- expiration tracking
That way readiness is based on the real current record, not on someone's memory of which document looked fine last week.
Why spreadsheets break down
Most teams start with spreadsheets because they are flexible and familiar.
They break down once the same vendor has to move through:
- intake
- review
- approvals
- booth planning
- permit follow-up
- weekly sessions
- fee review and closeout
At that point the problem is not only “data entry.” It is the handoff between workflows.
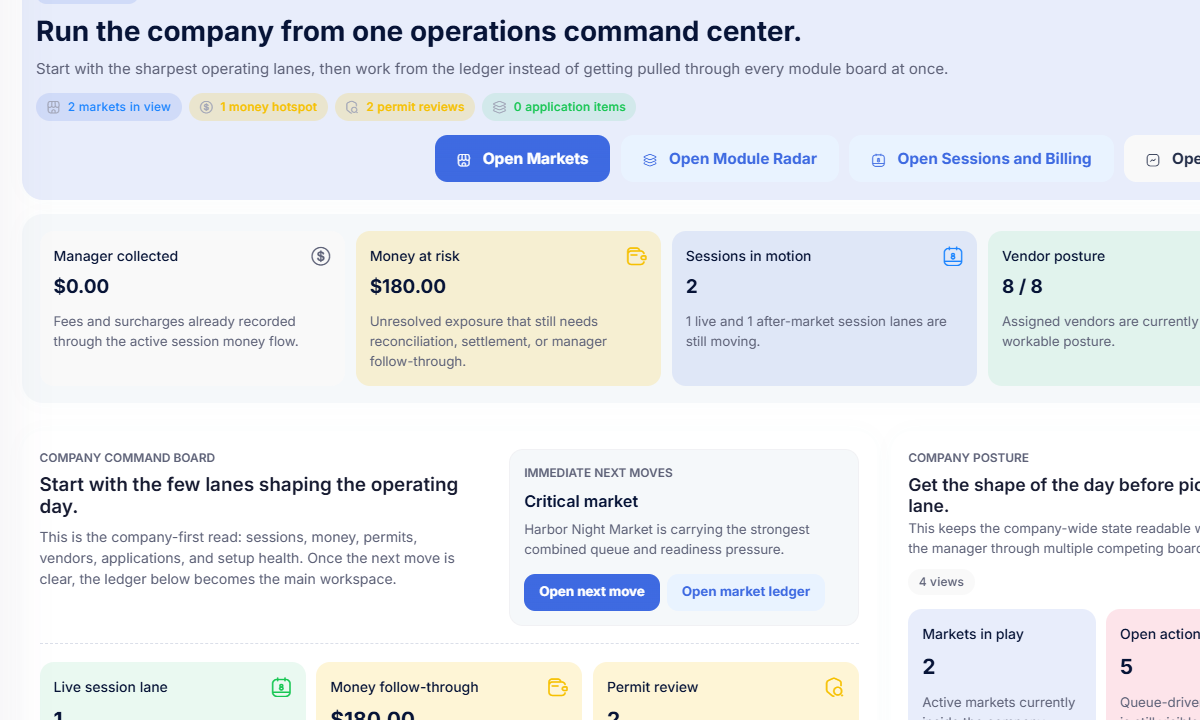
A better way to run a farmers market
The Market Manager is farmers market management software built for recurring markets. It helps teams manage application programs, vendor reviews, handoff into live rosters, booth maps, permit review, sessions, billing, and market-day operations in one connected workflow instead of across separate spreadsheets and inboxes.
If your team is trying to run weekly or seasonal markets without rebuilding the same information every cycle, a connected workflow is the real upgrade.
Frequently asked questions
How do you run a farmers market without spreadsheets?
The easiest way is to keep application intake, vendor records, booth assignments, permit review, sessions, and billing inside one connected system. That reduces re-entry and makes each market cycle easier to repeat.
What is the hardest part of running a recurring market?
Usually it is not a single task. It is the handoff between intake, approvals, booth maps, compliance, and closeout. That is why recurring markets often move away from disconnected tools.
How do weekly farmers markets stay organized?
Weekly markets usually rely on a repeatable structure: schedules, vendor records, sessions, invite links, booth assignments, permit tracking, and money review that carry forward from one market cycle to the next.
Related resources
- How to manage vendor applications for farmers markets
- How to collect vendor payments for a farmers market
- How to assign booths and layout a farmers market
- How to manage vendor permits and compliance for a farmers market
See how it works
Most teams switch once spreadsheets and manual tracking start slowing down weekly operations.
If you want to see how The Market Manager handles recurring market operations in one workflow: